Gatsby.jsで.env.*を使う
doiken
デロイト トーマツ ウェブサービス株式会社(DWS)公式ブログ

こんにちは。最近フロントエンドのテストについて興味ありなtanesanです。
今回はStorybookのTest runnerを使って、Storyをテスト化→Github Actionsを使ったCIパイプラインの作成をゴールに、プロジェクトの作成からハンズオン形式で紹介していきます。
今回はViteを使用してプロジェクトを作成していきます。使用したNode.jsのバージョンはv18.16.1です。
プロジェクトの作成
npx create-vite <プロジェクト名>フレームワークはReactを選択。
variantはTypeScriptを選択
ひとまずプロジェクトを立ち上げてみます。
npm install
npm run dev
↓の画面が出ていればOKです。

今回は簡単なフォームのコンポーネントを作成して、こちらを対象にしてStorybookを使ったテストを作成していきます。
src配下にcomponentsディレクトリを作成してUserForm.tsxを作成します。
import { useRef, useState } from 'react';

type User = {
  name: string;
  age: number;
  email: string;
};

export const UserForm = () => {
  const [user, setUser] = useState<User | undefined>();
  const nameRef = useRef<HTMLInputElement>(null);
  const ageRef = useRef<HTMLInputElement>(null);
  const emailRef = useRef<HTMLInputElement>(null);

  const handleSubmit = (event: React.FormEvent<HTMLFormElement>) => {
    event.preventDefault();
    setUser({
      name: nameRef.current!.value,
      age: Number(ageRef.current!.value),
      email: emailRef.current!.value,
    });
  };

  return (
    <>
      <form
        style={{ display: 'flex', flexDirection: 'column', width: '400px' }}
        onSubmit={handleSubmit}
      >
        <label htmlFor="name">Name</label>
        <input id="name" placeholder="name" ref={nameRef} />
        <label htmlFor="age">Age</label>
        <input id="age" placeholder="age" type="number" ref={ageRef} />
        <label htmlFor="email">Email</label>
        <input id="email" placeholder="email" type="email" ref={emailRef} />
        <button type="submit">Submit</button>
      </form>
      <ul>
        <li>Name: {user?.name}</li>
        <li>Age: {user?.age}</li>
        <li>Email: {user?.email}</li>
      </ul>
    </>
  );
};
名前・年齢・メールアドレスを入力して「Submit」ボタンを押すと内容がフォームの下に表示されるといったコンポーネントです。
UserForm.tsxのStorybookを作成していきます。まずはStorybookを使用できるようにします。
インストール
npx storybook@latest initコンポーネントを表示するだけのStoryを作ってみます。
import { Meta, StoryObj } from '@storybook/react';
import { UserForm } from './UserForm';

const meta = {
  component: UserForm,
} satisfies Meta<typeof UserForm>;

export default meta;
type Story = StoryObj<typeof meta>;

export const Default: Story = {};
Storybookを立ち上げてみます。
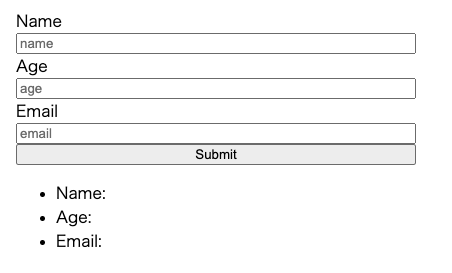
npm run storybook正常に起動できれば↓のようにコンポーネントが表示されます。
Play functionは、ユーザのインタラクションを再現したStoryを作成できるStorybookの機能です。
Play functionを使用するために必要なモジュールをインストールします。
npm install @storybook/testing-library @storybook/jest @storybook/addon-interactions --save-dev
まずは、「Name」を入力するStoryを作ってみます。
// nameの入力
export const InputName: Story = {
  play: async ({ canvasElement }) => {
    const canvas = within(canvasElement);

    const nameInput = canvas.getByRole('textbox', {
      name: 'Name',
    });
    await userEvent.type(nameInput, 'example-name', {
      delay: 100,
    });
  },
};Testing-libraryとほぼ同じ要領で、要素を取得しインタラクションを与えることができます。
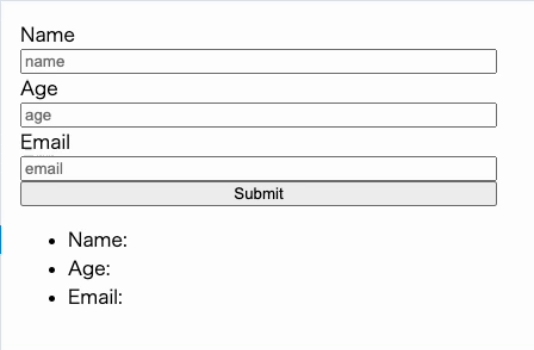
Play functionはStorybookのInteractionsタブで確認できます。正常に動作していれば↓の通りになります。
Play functionの再利用
Play function内で、別StoryのPlay functionを呼び出すことで、Play functionの再利用ができます。InputNameの要領で年齢を入力するStory(InputAge)、Emailを入力するStory(InputEmail)を作成します。そしてそれらのStoryを呼び出し、フォームを入力したあとに「Submit」ボタンを押すStory(InputAll)を作成します。
// ageの入力
export const InputAge: Story = {
play: async ({ canvasElement }) => {
const canvas = within(canvasElement);
const ageInput = canvas.getByRole('spinbutton', {
name: 'Age',
});
await userEvent.type(ageInput, '20', {
delay: 100,
});
},
};
// emailの入力
export const InputEmail: Story = {
play: async ({ canvasElement }) => {
const canvas = within(canvasElement);
const emailInput = canvas.getByRole('textbox', {
name: 'Email',
});
await userEvent.type(emailInput, 'example-email@email.com', {
delay: 100,
});
},
};
export const InputAll: Story = {
play: async (ctx) => {
await InputName.play?.(ctx);
await InputAge.play?.(ctx);
await InputEmail.play?.(ctx);
// submit
const canvas = within(ctx.canvasElement);
const submitButton = canvas.getByRole('button', {
name: 'Submit',
});
await userEvent.click(submitButton);
},
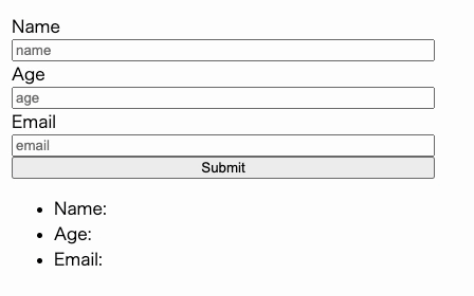
};正常に動作していれば↓のとおりになります。
Play functionの準備の際にインストールしたjestのアドオンを使うとPlay funtion内でアサーションを書くことができます。
InputAllに「Submit」ボタン押下後に入力した情報が表示されているか検証するアサーションを書いてみます。
export const InputAll: Story = {
play: async (ctx) => {
await InputName.play?.(ctx);
await InputAge.play?.(ctx);
await InputEmail.play?.(ctx);
const canvas = within(ctx.canvasElement);
const submitButton = canvas.getByRole('button', {
name: 'Submit',
});
await userEvent.click(submitButton);
const listItems = canvas.getAllByRole('listitem');
// ↓追加
expect(listItems[0]).toHaveTextContent('Name: example-name');
expect(listItems[1]).toHaveTextContent('Age: 20');
expect(listItems[2]).toHaveTextContent('Email: example-email');
},
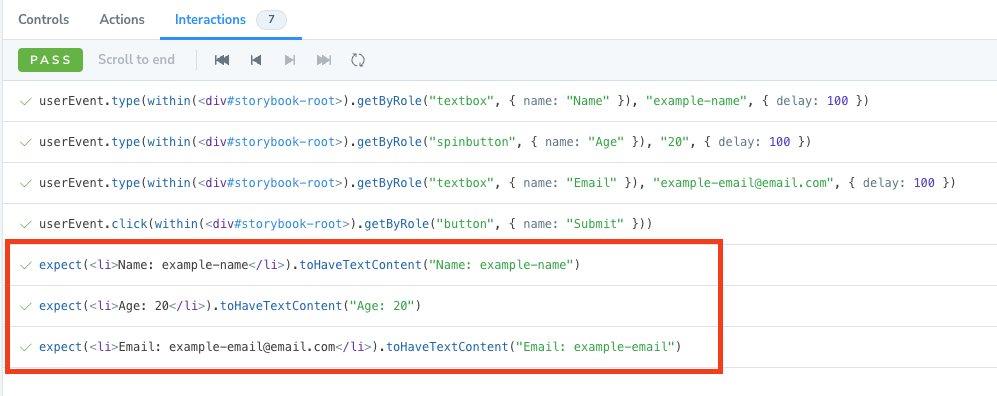
};追記後にもう一度StorybookのInteractionsタブを確認すると、アサーションが追加されているはずです。
StorybookのTest runnerを導入し、Storyを実行可能なテストとして扱えるようにします。Storyをテストとして扱うことで、Storyがエラーなしでレンダリングができるか・インタラクションが意図した通りに動作しているかを検証できます。
インストール
npm install @storybook/test-runner --save-devpackage.jsonのscriptsに追記
{
  "scripts": {
    "test-storybook": "test-storybook"
  }
}
テストを実行してみます。(storybookを立ち上げておく必要があります)
npm run test-storybookstorybookを正しく記述できていればPASSしているはずです。
Storybookのテストを含むCIを作成します。今回はStorybook公式の「Run against non-deployed Storybooks」を参考にGithub Actionsのworkflowを作成します。
# .github/workflows/storybook-tests.yml

name: 'Storybook Tests'
on: push
jobs:
  test:
    timeout-minutes: 60
    runs-on: ubuntu-latest
    steps:
      - uses: actions/checkout@v3
      - uses: actions/setup-node@v3
        with:
          node-version: '16.x'
      - name: Install dependencies
        run: yarn
      - name: Install Playwright
        run: npx playwright install --with-deps
      - name: Build Storybook
        run: yarn build-storybook --quiet
      - name: Serve Storybook and run tests
        run: |
          npx concurrently -k -s first -n "SB,TEST" -c "magenta,blue" \
            "npx http-server storybook-static --port 6006 --silent" \
            "npx wait-on tcp:6006 && yarn test-storybook"
今回の例では公式ページのサンプルのままでOKです。
workflowファイルを作成後、リモートリポジトリにpushします。(リポジトリの作成は適宜お願いします)
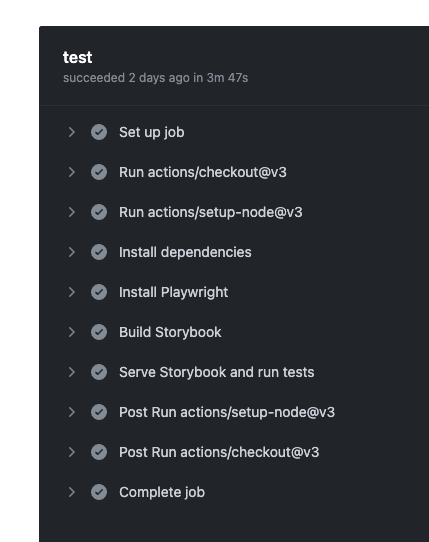
GithubのActionsタブからCIの実行結果を確認します。正しく設定されていれば↓のように成功しているはずです。
この記事では、StorybookのStoryをテスト化し、CIに組み込む方法を紹介しました。Play functionを利用することで、コンポーネントの外観だけではなく振る舞いまでをStorybookで検証することが可能になります。
Storybookのテスト化は、Jest+Testing Libraryを使用してテストを作成するよりも、コンポーネントの実際の振る舞いを理解しやすく、テストが書きやすいと思いました。また、適切にストーリーを作成すれば、コンポーネントの仕様をStorybookだけで共有することが可能となるので、非エンジニアの方との連携がスムーズになるメリットもあるかと思います。
CIの設定と作成したコンポーネントのStoryさえ作成しておけば、レンダリングのエラーを自動的に検出することができるので、この仕組みをプロジェクト初期から組み込むことで、デグレの削減が期待できるのもいいですね。Storybookのテスト化おすすめです!