RxJS(5.x)で行うテストファーストな機能開発
mmmuser
デロイト トーマツ ウェブサービス株式会社(DWS)公式ブログ

4月にこの記事を読んで、4時半起きを実践してみているのですが、最近は起きるとまだあたりが暗いんですよね。
もう秋だなぁ…と実感する日々の佐々木です。
今回は、AngularJS を使っていて、「これ、どうやってやるんだろう」って思ったことや、使ってみて便利だったモジュールを簡単にまとめてみました。
今後また使う可能性もあるので、自分の備忘録も兼ねて。
Yeomanを使いアプリを作成します。
$ yo angular sampleAngularJS で Google マップを使いたい場合です。
今回は、angular-google-maps を使います。
Quickstart を参考に。
bower で angular-google-maps をインストールします。
$ bower install angular-google-maps --saveindex.html や テンプレート html に Google Maps API を記載します。
<script src='https://maps.googleapis.com/maps/api/js?sensor=false'></script>
<script src='/path/to/lodash.underscore[.min].js'></script>
<script src='/path/to/angular-google-maps[.min].js'></script>google-maps モジュールを app.js に入れます。
$ vi app/scripts/app.js'use strict';
/**
* @ngdoc overview
* @name sampleApp
* @description
* # sampleApp
*
* Main module of the application.
*/
angular
.module('sampleApp', [
'ngAnimate',
'ngCookies',
'ngResource',
'ngRoute',
'ngSanitize',
'ngTouch',
'google-maps' //ここに追加
])
.config(function ($routeProvider) {
$routeProvider
.when('/', {
templateUrl: 'views/main.html',
controller: 'MainCtrl'
})
.when('/about', {
templateUrl: 'views/about.html',
controller: 'AboutCtrl'
})
.otherwise({
redirectTo: '/'
});
});下記のように、緯度経度の情報などを設定します。
$ vi app/scripts/controllers/main.js'use strict';
/**
* @ngdoc function
* @name sampleApp.controller:MainCtrl
* @description
* # MainCtrl
* Controller of the sampleApp
*/
angular.module('sampleApp')
.controller('MainCtrl', function ($scope) {
$scope.map = {
center: {
latitude: 35.681382,
longitude: 139.766084
},
zoom: 14
};
});必要があれば、他にもオプションが指定できるので、こちらの API documentation を参考に設定してみてください。
例えば地図上にピンを立てたいときには、marker の設定が必要です。
$ vi app/views/main.html<google-map center="map.center" zoom="map.zoom"></google-map>css に設定を追加します。
$ vi app/styles/main.css.angular-google-map-container { height: 400px; }結果。どーん。東京駅です。なんとなく。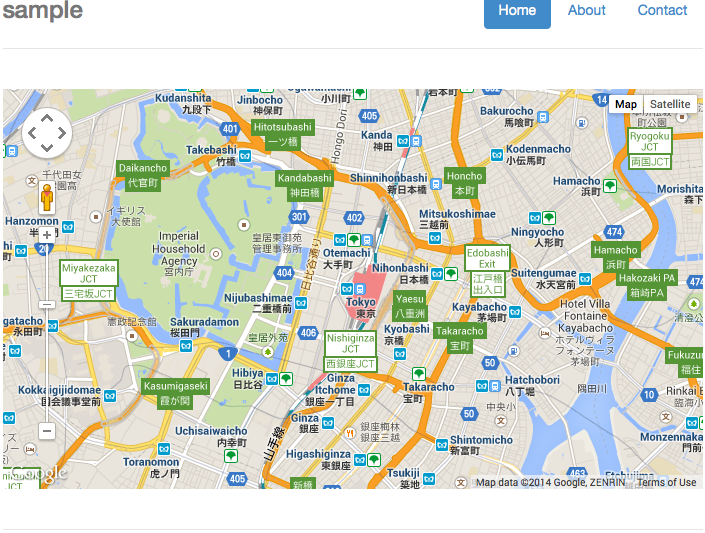
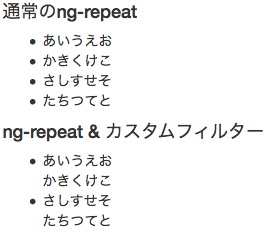
ng-repeat を使ってループすると、
<ul>
  <li ng-repeat="item in ['あいうえお', 'かきくけこ', 'さしすせそ', 'たちつてと']">{{ item }}</li>
</ul>
{% raw %}
{% endraw %}
通常はこんな感じになるかと思います。
<ul>
  <li>あいうえお</li>
  <li>かきくけこ</li>
  <li>さしすせそ</li>
  <li>たちつてと</li>
<ul>
これを、例えばこういう風にしたい場合です。
<ul>
  <li>
    <div>
      あいうえお
      かきくけこ
    </div>
  </li>
  <li>
    <div>
      さしすせそ
      たちつてと
    </div>
  </li>
<ul>【参考URL】how to split the ng-repeat data with three columns using bootstrap
上記のURLを参考にやってみました。
Yeomanを使いフィルターを作成。
$ yo angular:filter partition【参考URL】のフィルターを partition.js に書きます。
$ vi app/scripts/filters/partition.js'use strict';
/**
* @ngdoc filter
* @name sampleApp.filter:partition
* @function
* @description
* # partition
* Filter in the sampleApp.
*/
angular.module('sampleApp')
.filter('partition', function() {
var cache = {};
var filter = function(arr, size) {
if (!arr) { return; }
var newArr = [];
for (var i=0; i<arr.length; i+=size) {
newArr.push(arr.slice(i, i+size));
}
var arrString = JSON.stringify(arr);
var fromCache = cache[arrString+size];
if (JSON.stringify(fromCache) === JSON.stringify(newArr)) {
return fromCache;
}
cache[arrString+size] = newArr;
return newArr;
};
return filter;
});処理の内容としては、渡した配列から指定した要素数で配列にまとめなおして作成してくれるものです。
先ほど作成した partition フィルターをまとめたい要素数を引数にしてフィルターの設定します。
li の中に、2つずつ入れたいのでここでは、2 を設定。
  <ul>
    <li ng-repeat="rows in ['あいうえお', 'かきくけこ', 'さしすせそ', 'たちつてと']| partition:2">
      <div ng-repeat="item in rows">{{ item }}</div>
    </li>
  </ul>
{% raw %}
{% endraw %}
結果。
モーダルを使いたい場合、ui.bootstrap を使って実装します。
まずは bower を使って、ui.bootstrap をインストールします。
$ bower install angular-bootstrap --saveapp.js に ui.bootstrap を追加します。
$ vi app/scripts/app.js'use strict';
/**
* @ngdoc overview
* @name sampleApp
* @description
* # sampleApp
*
* Main module of the application.
*/
angular
.module('sampleApp', [
'ngAnimate',
'ngCookies',
'ngResource',
'ngRoute',
'ngSanitize',
'ngTouch',
'ui.bootstrap' //ここに追加
])
.config(function ($routeProvider) {
$routeProvider
.when('/', {
templateUrl: 'views/main.html',
controller: 'MainCtrl'
})
.when('/about', {
templateUrl: 'views/about.html',
controller: 'AboutCtrl'
})
.otherwise({
redirectTo: '/'
});
});モーダルインスタンス用のコントローラーを作成します。
$ yo angular:controller my_modal先ほど作成したモーダルインスタンス用のコントローラーを編集します。
$ vi app/scripts/controllers/my_modal.js'use strict';
/**
* @ngdoc function
* @name sampleApp.controller:MyModalCtrl
* @description
* # MyModalCtrl
* Controller of the sampleApp
*/
angular.module('sampleApp')
.controller('MyModalCtrl', function ($scope, $modalInstance, items) {
$scope.items = items;
$scope.selected = {
item: $scope.items[0]
};
$scope.ok = function () {
$modalInstance.close($scope.selected.item);
};
$scope.cancel = function () {
$modalInstance.dismiss('cancel');
};
});$modalInstance と 呼び出し元から渡ってくる items を引数に持っているのに注意して下さい。
OK ボタンを押したときのファンクションと、キャンセルボタンを押したときのファンクションを定義します。
OK ボタンを押したときには、選択されている item を呼び出し元へ引き渡します。
モーダルのテンプレート html を作成。
$ yo angular:view my_modal先ほど作成したテンプレート html を編集。
$ vi app/views/my_modal.html<div class="modal-header">
<h3 class="modal-title">モーダルタイトル</h3>
</div>
<div class="modal-body">
<ul>
<li ng-repeat="item in items">
<a ng-click="selected.item = item">{{ item }}</a>
</li>
</ul>
選択中: <b>{{ selected.item }}</b>
</div>
<div class="modal-footer">
<button class="btn btn-primary" ng-click="ok()">OK</button>
<button class="btn btn-warning" ng-click="cancel()">Cancel</button>
</div>{% raw %}
{% endraw %}
$ vi app/scripts/controllers/main.js'use strict';
/**
* @ngdoc function
* @name sampleApp.controller:MainCtrl
* @description
* # MainCtrl
* Controller of the sampleApp
*/
angular.module('sampleApp')
.controller('MainCtrl', function ($scope, $modal, $log) {
$scope.items = ['111111', '222222', '333333'];
$scope.open = function (size) {
var modalInstance = $modal.open({
templateUrl: 'views/my_modal.html',
controller: 'MyModalCtrl',
size: size,
resolve: {
items: function () {
return $scope.items;
}
}
});
modalInstance.result.then(function (selectedItem) {
$scope.selected = selectedItem;
}, function () {
$log.info('Modal dismissed at: ' + new Date());
});
};
});$modal を引数に設定しているところに注意です。
先ほど作成した、モーダルインスタンス管理用のコントローラー (MyModalCtrl) と、テンプレート html (views/my_modal.html) を指定します。
ここで、注意。
UI Bootstrap の公式ページのドキュメント では、コントローラー名に、シングルクォーテーションが入っていないのですが、それにならって同じように書いてしまうと、エラーになります。
ui bootstrap modal's controller 'is not defined'
この解決策を参考に、コントローラー名はシングルクォーテーションで囲んだら行けました。
モーダルの呼び出し元のテンプレート html を編集します。
先ほどコントローラーで定義した、open() に、引数でサイズ(lg と sm)を渡すことで描画するモーダルのサイズを変更できます。
$ vi app/views/main.html<button class="btn btn-default" ng-click="open()">通常</button>
<button class="btn btn-default" ng-click="open('lg')">大きめ</button>
<button class="btn btn-default" ng-click="open('sm')">小さめ</button>
<div ng-show="selected">モーダルで選択された選択肢: {{ selected }}</div>{% raw %}
{% endraw %}
結果。
呼び出し元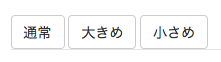
通常のモーダル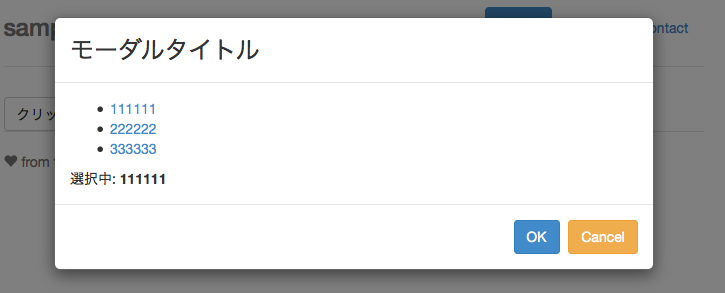
選択肢を選んだ後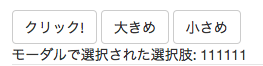
「モーダルで選択された選択肢」でモーダル側で選択したものが呼び出し元にも渡ってきているのが確認できます。
大きめのモーダル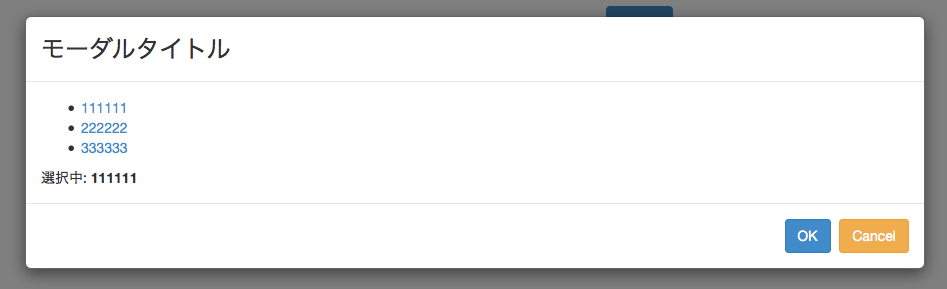
小さめのモーダル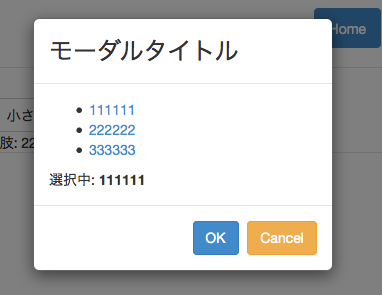
いかがだったでしょうか。まだまだ AngularJS については、勉強することばかりで大変ですが、今後も AngularJS で使ったモジュールや、ハマった箇所などを随時ご紹介していきたいと思ってます。
こんな便利なモジュールがあるよ、等の情報ありましたら教えていただけると嬉しいです!
今回ご紹介したような、AngularJSなどのフレームワークを活用したフロントエンドアプリケーション開発を御希望の企業様は、是非お気軽にMMMにご相談下さいませ!